Views
For example, if a plan has an hours bank, you could create a view that includes hours bank data, a view for plans that don't have an hours bank, and use another view to show a different data set.
If the table has an options menu, the menu could include options for adding, editing, copying, and deleting views. Tables that don't support this functionality either won't have an options menu or the menu won't have menu items for changing views.
Select a view
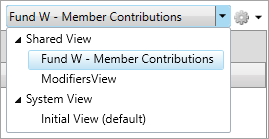
At the top of the table is a list that displays the views available for selection. Select a view from the list. Shared views are available to all system users. Personal views are those only you can see and access.
Set a default view
- Select the view you want to set as default from the list.
- On the options menu
 , click
 Set as default. The view displays in the view list with(default)at the end of the name.
- On the options menu , click
Add view. - In the
View Namebox, enter a name for your view. - Add columns to the view.
- In the
Available Columnslist, select the column you want to display in your view and click the right arrow to move the column to theSelected Columnsarea.You can also use the
ShiftorCtrlkeys to select multiple columns to move to theSelected Columnslist.
- If you have permission to create shared views, click the
Share this viewcheck box beneath theAvailable Columnslist to make it available to all users. Leave the check box blank to make it a personal view that only you can see and access.
- In the
- Tailor your view:
Change Column Headings—In theSelected Columnsarea, double-click in theDisplay Namecolumn to change the column heading.Change Column Order—Columns will display left to right in the view based on the order they display in theSelected Columnsarea. Move columns up and down to get the necessary order by selecting the column name and clicking the or
or  arrow to the right of the
 Selected Columnsarea.
- Click
Savein theView Designerwindow. -
Click
 on the workspace toolbar to save the changes.
You can't edit an initial view.
- On the options menu , click
Edit view. - Make changes to the view's settings. Refer to Common features for filtering, grouping, and sorting columns and other table features.
-
Click
to save.
You can copy a view and use it as a starting point for creating a new view.
- On the options menu , click
copy view. - In
View Name, type a new name for the view. - Make changes to the view's settings. Refer to Common features for filtering, grouping, and sorting columns and other table features.
-
Click
to save.
You can't delete an initial view.
- On the options menu , click
Delete view. - In the confirmation message, click
OKto delete the view.